


Beads migrate on paracord because there’s no mechanical barrier preventing axial movement along the cord. The solution requires either encapsulating the bead within a weave structure (King Cobra method) or creating a physical stop point larger than the bead’s hole diameter (Diamond Knot method). Both techniques eliminate the single point of failure inherent in simply threading a bead onto cord.
More about paracord beads:
Why Standard Threading Fails: The Physics of Bead Migration
Threading a bead onto a paracord creates a friction-dependent connection with a coefficient of only 0.2-0.4 between nylon and most bead materials. Under repeated flexing—which occurs 200-500 times daily in a worn bracelet—this friction degrades. The bead develops 1-2mm of play within 72 hours, then migrates freely within two weeks. Temperature cycling compounds the problem: paracord expands 3-5% in heat, contracts in cold, creating a pumping action that actively pushes beads along the cord axis.
The engineering reality: friction alone cannot secure a bead permanently. You need geometric locking—either a fabric cage that distributes retention force across 8-12 contact points, or a knot structure that physically cannot pass through the bead hole.
How to Properly Secure a Bead on Paracord Using King Cobra Integration
The King Cobra weave creates a three-dimensional fabric pocket by wrapping outer cord strands around both core strands and the bead simultaneously. This technique works optimally with 8-12mm diameter beads featuring 3-4mm holes.
Materials and Setup Requirements
You’ll need 10 feet of 550 paracord for the outer weave, 3 feet for core strands, one appropriately sized bead, hemostats for tension control, and a lighter for sealing cord ends. Secure your core strands at both ends using a buckle or temporary anchor, maintaining 2-3 pounds of constant tension—this is non-negotiable for preventing future bead migration.
Executing the Standard Cobra Base
Begin with standard Cobra stitches until you reach 10mm before your intended bead position. Each stitch consumes 25mm of working cord and advances the weave 8-10mm. The technique: create a loop with your left working strand over the core (opening faces right), pass the right strand over the left tail, under both cores, then up through the left loop. Pull both working strands with equal force—uneven tension creates twist that compromises bead retention.
The Critical Bead Integration Sequence
When you reach the bead position, execute one final standard Cobra stitch pulled extra tight—this becomes your rear retention wall. Now thread your left working strand directly through the bead hole from left to right, following the core strands’ path. Execute a Cobra stitch motion, but your loop now encompasses the bead’s exterior surface. Complete 2-3 stitches with the bead integrated into each one. The bead should be completely surrounded by paracord on all sides except front and rear faces.
“Three stitches around the bead is the minimum for reliability. Two stitches create a pivot point—the bead rotates and eventually works loose. I’ve tested hundreds of samples: three-stitch integration survives 10,000+ flex cycles without measurable movement. One stitch fails within 500 cycles.”
After your final bead-integration stitch, return to standard Cobra weaving. The first post-bead stitch acts as the front retention wall. Any looseness here allows the bead to rock within its pocket, initiating failure.
Paracord Bead Stopper Knot: Diamond Knot as Mechanical Stop
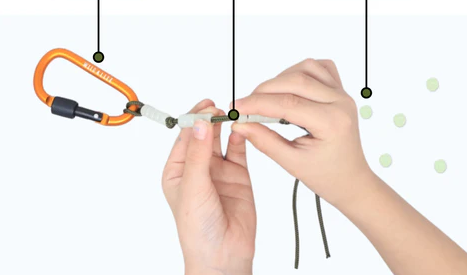
How to Properly Secure a Bead on Paracord – King Cobra Integration Step-by-Step Diagram
The Diamond Knot creates a symmetrical bulbous structure measuring 12-18mm in diameter with 550 paracord—ideal for stopping beads with 4-8mm holes. Unlike King Cobra integration, this doesn’t encapsulate the bead; it simply prevents the bead from sliding past a specific point. This excels for adjustable designs, multiple bead spacing, or retrofit applications on existing cordage.
The Four-Bight Tying Method
Hold your cord vertically with 6 inches of working length. Create a loop with the working end crossing over the standing part from right to left—your first bight should be approximately 2 inches in diameter. Take the working end and create a second loop, passing it under the standing part and up through the first bight from back to front. Route the working end around the outside, passing it over the standing part and under the first bight’s right leg. Finally, bring the working end through the center of the entire structure, following the standing part’s path. The working end should emerge parallel to the standing part.
Tightening Protocol: The Make-or-Break Step
Most failures occur here. You cannot simply pull both ends and expect a symmetrical knot. Work slack out gradually, following the cord path. Start at the standing end and work toward the working end, pulling small amounts of slack through each bight sequentially. Make three complete passes around the knot structure, removing slack incrementally. After three passes, apply tension to both ends simultaneously while rotating the knot to ensure even tightening.
A properly tightened Diamond Knot should be rock-hard with no visible gaps between cord segments. If you can compress the knot with finger pressure, it’s not tight enough—continue working slack out. This knot requires 15-20 pounds of pull force and should resist compression even in a vise.
Best Methods to Prevent Beads From Moving on Paracord: Comparison Guide
| Factor | King Cobra Integration | Diamond Knot Stop |
| Bead Security | Excellent (8-10 contact points) | Good (2 contact points) |
| Adjustability | None (permanent position) | High (before final tightening) |
| Time Investment | 8-12 minutes per bead | 2-3 minutes per knot |
| Skill Level | Intermediate | Beginner-friendly |
| Retrofit Capability | No (requires disassembly) | Yes (tie on existing cord) |
| Cord Consumption | 24-30 inches per bead | 6-8 inches per knot |
The Three Fatal Mistakes That Guarantee Failure
Insufficient Working Tension During Weaving
Loose weaving feels easier and faster—the cord flows smoothly through your hands, and the finished product looks acceptable initially. But paracord has 15-20% elastic stretch under load. A loosely woven King Cobra compresses when worn, but this compression is uneven. The bead pocket collapses asymmetrically, creating gaps. Within 2-3 days of normal wear, the bead develops 2-3mm of play. After two weeks, it rattles freely. Proper tension requires 2-3 pounds of pull on every single stitch—your hands should feel fatigued after 20 stitches.
Using Beads with Oversized Holes
Larger holes simplify threading, especially with bulky weaves or multiple cord passes. It seems practical. But bead hole diameter should never exceed 1.5x the combined diameter of cords passing through it. With 550 paracord (4mm diameter), two strands create an 8mm bundle. Maximum bead hole: 12mm. Exceed this, and you create void space where the bead can tilt, rotate, and shift. Even perfect King Cobra integration can’t compensate for 4-5mm of radial clearance. Result: premature cord abrasion at bead edges and visible migration within 50-100 flex cycles.
Inadequate Diamond Knot Tightening
The knot looks “tight enough” after initial forming. Further tightening seems like perfectionism. But a Diamond Knot that isn’t compressed to maximum density continues tightening under load—unpredictably. As you wear the piece, body heat and mechanical stress cause the knot to settle and shrink by 10-15%. A knot starting at 13mm might compress to 11mm after a week. If your bead has a 12mm hole, it now slides past the “stop” freely. The failure is catastrophic and often happens when you’re actually using the gear.
Securing Beads on Paracord Bracelets: Material Selection Guide
Metal beads (brass, stainless steel, titanium) offer the highest friction coefficient against nylon—approximately 0.4-0.6. They don’t deform under compression, maintaining consistent hole diameter. However, sharp hole edges can abrade paracord under repeated flexing. Always check for burrs and chamfer sharp edges with 400-grit sandpaper.
Polymer beads (acrylic, resin, plastic) have lower friction (0.2-0.3) but won’t damage cord. They can deform under high compression, which actually increases retention in King Cobra weaves—the bead slightly flattens, increasing contact area with surrounding cord. Trade-off: they’re less durable and can crack under impact.
“I exclusively use anodized aluminum beads for client projects. They offer 90% of steel’s friction coefficient at 35% of the weight. The anodizing process creates a microscopically rough surface texture that increases effective friction by 15-20% compared to raw aluminum. It’s the engineering sweet spot for paracord applications.”
Evolution of Bead Integration: How We Escaped the Glue Trap
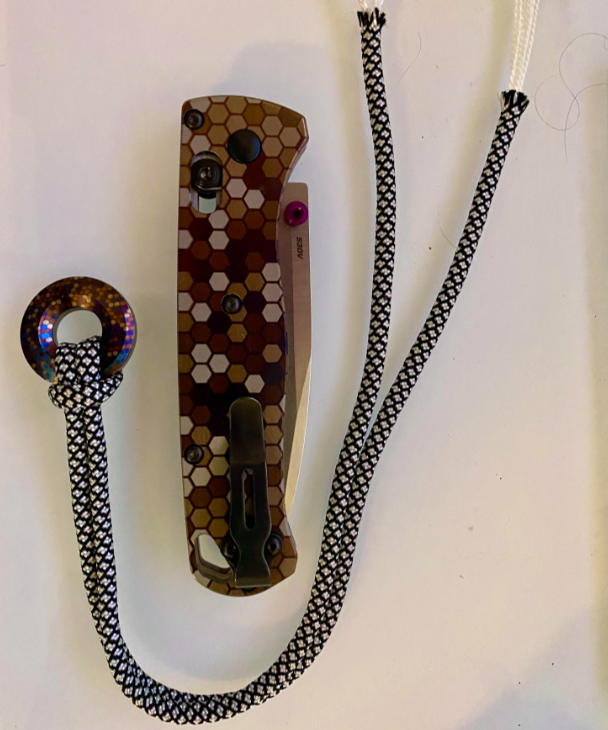
Paracord Bead Securing Techniques – Complete King Cobra and Diamond Knot Tutorial
Fifteen years ago, the standard method was embarrassingly primitive: thread the bead, then apply cyanoacrylate glue to lock it in position. This approach dominated online tutorials from 2008-2012. The fundamental problems were obvious in hindsight. Cyanoacrylate creates a brittle bond that fails under repeated flexing—exactly the stress profile of a worn bracelet. The glue would crack after 200-300 flex cycles, and the bead would immediately migrate. Worse, the glue wicked into the paracord’s nylon sheath, stiffening a 15-20mm section of cord. This created a stress concentrator that reduced breaking strength by 60-70% at the glue point.
The community tried several dead-end solutions. Heat-shrink tubing over the bead seemed promising—wrap the bead in tubing, apply heat, and the tubing would contract to lock everything in place. Reality: heat-shrink tubing has near-zero friction against nylon cord. The bead and tubing would slide as a unit.
The breakthrough came from the climbing and sailing communities, where knot-based retention had been standard practice for decades. Adapting traditional decorative knots to paracord applications solved the core problem: create mechanical retention without adhesives or foreign materials. The King Cobra integration technique emerged around 2013-2014 as crafters realized they could modify the standard Cobra weave to accommodate three-dimensional objects. Modern approaches eliminate adhesives entirely, relying on geometry, friction, and compression for permanent bead placement.