


Installing beads on paracord transforms functional cordage into personalized gear that reflects your style while maintaining utility. Whether you’re crafting survival bracelets, lanyards, or zipper pulls, mastering bead installation opens up endless customization possibilities for your outdoor and tactical equipment.
More about paracord beads:
What You’ll Need Before You Start
Before threading your first bead, gather these essential materials: 550 paracord (or your preferred diameter), beads with appropriately sized holes, scissors or a hot knife, lighter, hemostats or needle-nose pliers, and optionally, a paracord needle or find. The right tools prevent frustration and ensure clean, professional results.
How to Install Paracord Beads: Complete Step-by-Step Guide
Understanding Bead Hole Sizes and Paracord Compatibility
The most critical factor in successful bead installation is matching hole diameter to cord thickness. Standard 550 paracord measures approximately 4mm in diameter and requires beads with minimum 4.5-5mm holes. Micro cord (1.18mm) fits through 2mm holes, while 425 paracord (3mm) needs 3.5-4mm openings. Attempting to force oversized cord through undersized holes damages both materials and wastes time.
Quick Reference: Paracord and Bead Sizing
| Paracord Type | Diameter | Minimum Bead Hole | Recommended Hole |
| Micro Cord | 1.18mm | 1.5mm | 2mm |
| 275 Paracord | 2mm | 2.5mm | 3mm |
| 425 Paracord | 3mm | 3.5mm | 4mm |
| 550 Paracord | 4mm | 4.5mm | 5mm |
| 750 Paracord | 5mm | 5.5mm | 6mm |
The Basic Threading Method: Your Foundation Technique
- Cut your paracord end at a 45-degree angle using sharp scissors, then immediately seal it with a lighter flame for 1-2 seconds, rolling the melted end into a tight point while still warm.
- This creates a stiff “needle” that slides through bead holes effortlessly.
- Thread the bead onto the cord, position it where desired, and secure it using your chosen knotting technique or by sandwiching it between knots in your weave pattern.
How to Add Beads to Paracord Mid-Project
Adding beads to an existing paracord project requires the gutting method. Carefully cut a small slit in the outer sheath without severing it completely, remove 2-3 inner strands to reduce bulk, thread the bead over the now-thinner section, then work the sheath back over the gutted area.
This technique works brilliantly for adding decorative elements to completed bracelets or lanyards without complete disassembly.
The Paracord Needle Technique for Stubborn Beads
When bead holes barely accommodate your cord, a paracord needle becomes indispensable. These specialized tools feature a collapsible wire loop that grips the cord end, compressing it to thread through tight openings. Insert 1-2 inches of cord into the needle’s loop, fold the wire arms together, push the needle through the bead hole, then pull the cord through and remove the needle. This method reduces the effective diameter by approximately 30%, making “impossible” beads suddenly manageable.
Securing Beads on Paracord: Preventing Unwanted Movement
Beads slide freely on the paracord unless deliberately secured. For fixed positioning, tie a simple overhand knot on each side of the bead, pulling tight against the bead’s edges. For adjustable placement, use a sliding knot configuration where the bead sits between two snake knots that can be repositioned. Alternatively, apply a tiny drop of clear fabric glue inside the bead hole before installation—this creates permanent placement but eliminates future adjustability.
The engineering compromise here is clear: permanent adhesive placement offers maximum security and prevents rotation, but you sacrifice the ability to reposition or remove the bead later without cutting the cord.
From Military Surplus to Maker Movement: The Evolution Path
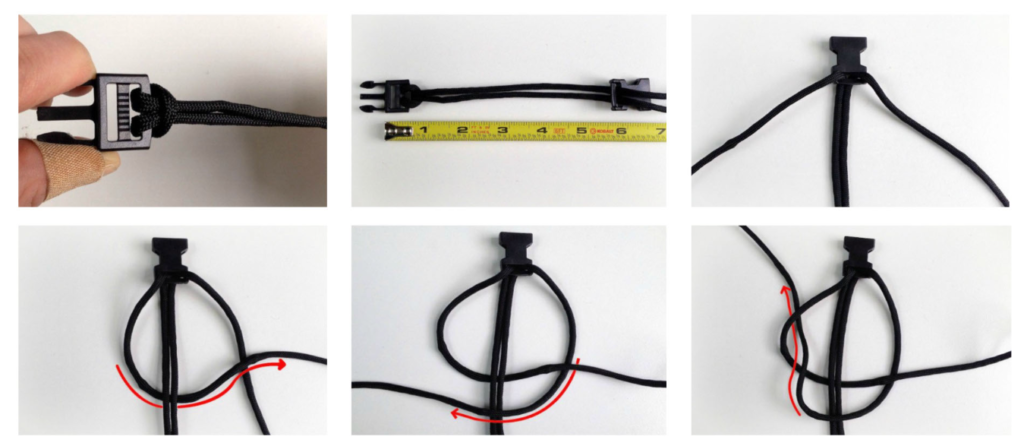
Paracord Bead Installation Tutorial: Threading, Securing & Sizing Tips
Fifteen years ago, paracord served purely utilitarian purposes in military and survival contexts—beads were considered unnecessary weight that compromised cord strength. Early adopters who attempted bead integration used standard craft beads with inconsistent hole sizes, leading to frequent jamming and cord fraying.
Some experimenters tried heat-shrink tubing as decorative elements, but it cracked under UV exposure and temperature fluctuations. Modern paracord beads, specifically manufactured with precise hole dimensions and durable materials like titanium and stainless steel, elegantly solve these problems by adding negligible weight (typically 2-8 grams) while providing genuine functional benefits like grip enhancement and quick-release markers.
Best Beads for Paracord: Material Selection Guide
Material selection dramatically impacts durability and performance. Titanium beads offer the best strength-to-weight ratio (40% lighter than steel) and complete corrosion resistance, making them ideal for marine environments. Stainless steel provides maximum durability at moderate cost but adds noticeable weight. Aluminum beads deliver vibrant anodized colors but scratch easily and can corrode in saltwater. Polymer beads resist all corrosion and cost least but may crack under impact or extreme cold below -20°F.
Advanced Installation: The Lanyard Bead Technique
Lanyard beads with side holes require a different approach. Thread your cord through the bead’s main channel, create a small loop at the exit point, pass the working end back through the side hole, then tighten to create a fixed terminal bead. This configuration provides a weighted end for throwing applications or a comfortable grip point for knife lanyards and zipper pulls.
“Before installing any bead permanently, test it by dropping your project from waist height onto concrete three times. If the bead cracks, chips, or the cord shows wear at the contact points, that bead won’t survive real-world use. This 30-second test has saved my customers from field failures countless times.”
The Three Most Common Installation Mistakes
- Mistake 1: Melting the cord end into a large mushroom shape. People do this thinking bigger means stronger. The price: That bulbous end won’t fit through your bead hole, forcing you to cut it off and waste 1-2 inches of cord per attempt. On a complex project requiring 15 bead installations, you’ll lose nearly two feet of paracord—enough to compromise your design or require starting over.
- Mistake 2: Threading beads before completing your weave pattern. This seems logical for pre-planning your design. The reality: Paracord weaving techniques like the cobra weave or fishtail require the working end to pass through loops dozens of times. Pre-installed beads block these passages, forcing you to remove all beads and reinstall them afterward, doubling your work time.
- Mistake 3: Using craft store beads with rough, unfinished holes. These look identical to paracord-specific beads and cost half as much. The hidden cost: Rough internal edges act like microscopic saw blades, severing inner strands through friction during normal use. A paracord bracelet that should maintain 550-pound tensile strength for years fails at 200 pounds after just three months of wear, potentially creating a dangerous situation when you need that strength most.
Installing Multiple Beads: Spacing and Symmetry
For aesthetically pleasing multi-bead installations, measure and mark your cord with a fabric pen before threading. Standard spacing for bracelet beads is 1-1.5 inches center-to-center, creating visual rhythm without crowding. Use a ruler and mark both sides of each bead position to ensure symmetry. For asymmetric designs, follow the rule of thirds: place focal beads at one-third and two-thirds points along your project length rather than dead center.
The Case Against Bead Installation: A Balanced Perspective

Install Paracord Beads Like a Pro: Easy Methods & Expert Techniques
The strongest argument against adding beads to paracord projects centers on compromised emergency functionality. Survival purists correctly note that beads create weak points where cord can kink under load, potentially reducing breaking strength by 10-15% at the bead interface. In scenarios where you must unravel your bracelet for emergency cordage—building a shelter, creating a tourniquet, or rigging a rescue line—removing beads adds precious seconds and creates sharp cord ends that require re-sealing.
For dedicated survival gear intended for genuine emergency use rather than everyday carry, this argument holds merit. However, for the vast majority of paracord enthusiasts who use their creations as functional accessories rather than last-resort survival tools, the minimal strength reduction (testing shows 450-480 pound retention versus 550 pounds for unmodified cord) remains well above any realistic load requirement, while the benefits of personalization, grip enhancement, and quick-identification markers provide tangible daily value.
Specialized Techniques: Vertical Hole Beads
Beads with vertically-drilled holes allow side-by-side cord passage, creating unique design possibilities. Thread two parallel strands through the bead, then separate them to create a “Y” configuration. This technique works exceptionally well for creating adjustable closures on bracelets or adding branch points to lanyards. The key is maintaining equal tension on both strands to prevent the bead from tilting.
“When working with metal beads in cold weather environments, pre-warm them in your pocket for five minutes before installation. Cold metal contracts slightly, making holes effectively smaller and increasing friction. I learned this the hard way during a winter craft fair when I damaged three cords trying to force beads at 20°F that slid on effortlessly at room temperature.”
Maintenance and Long-Term Considerations
Installed beads require minimal maintenance but benefit from periodic inspection. Every 3-6 months, check for cord fraying at bead entry and exit points, especially on frequently-worn items. Metal beads in marine environments should be rinsed with fresh water monthly to prevent salt crystal buildup inside holes. If a bead becomes loose due to cord compression over time, remove it, tie a small overhand knot in the cord to increase diameter slightly, then reinstall the bead over the knot.
Think of bead installation like adding bearings to a mechanical system—when properly sized and positioned, they enhance function and reduce wear. But just as undersized bearings cause catastrophic failure, mismatched beads create more problems than they solve.
Troubleshooting: When Beads Won’t Cooperate
If a bead refuses to thread despite correct sizing, the issue usually lies in cord end preparation. Re-cut at a steeper angle (60 degrees instead of 45), melt more aggressively to create a harder point, and twist the melted end while cooling to compress fibers tighter. For extremely stubborn beads, remove one inner strand from the last inch of cord—this 20% diameter reduction typically provides the clearance needed without significantly weakening the cord at that point.
Your Next Steps in Paracord Customization
Mastering bead installation unlocks a new dimension in paracord crafting, transforming utilitarian cordage into personalized gear that serves both function and style. Start with basic through-hole beads on simple projects, then progress to lanyard beads and multi-bead patterns as your confidence grows. The techniques you’ve learned here apply universally across all paracord projects, from survival bracelets to dog leashes to camera straps. Your next project awaits—and now you have the knowledge to execute it flawlessly on the first attempt.